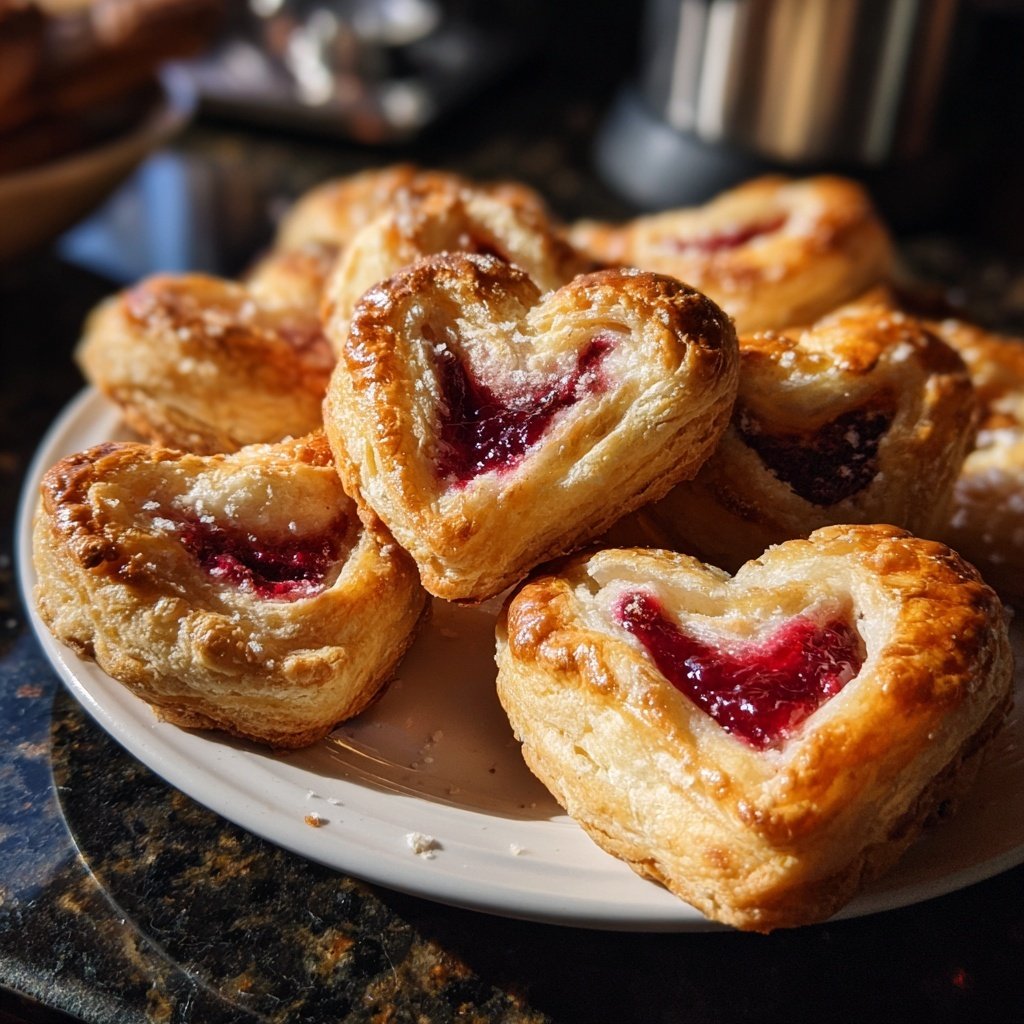
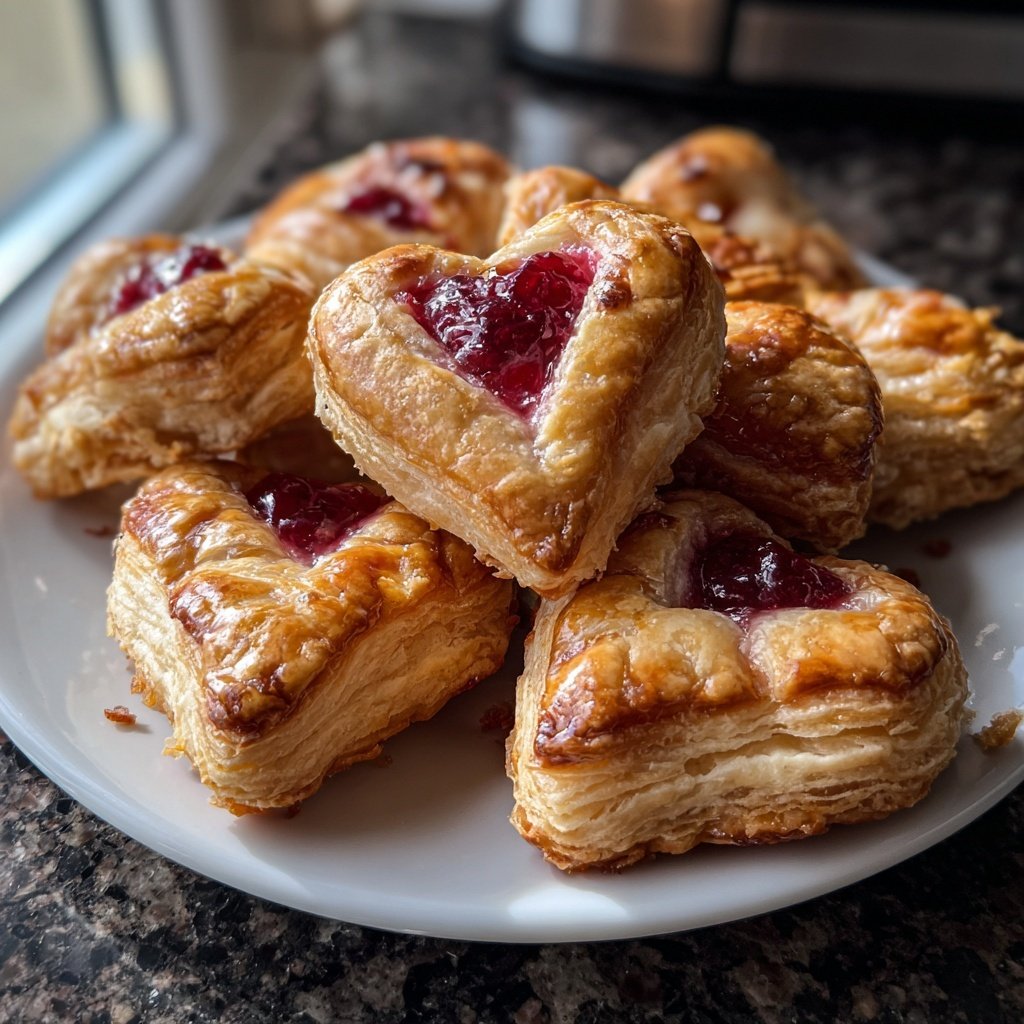
Valentines Snacks Mini Puff Pastries
Uitgelicht onder: Klassieke bakrecepten
I love making Valentines Snacks Mini Puff Pastries because they are incredibly easy to whip up and always impress. Each puff pastry is a delightful surprise, filled with sweet or savory treats that can please any palate. Whether it’s a romantic dinner or a cozy gathering with friends, these mini pastries never fail to add a touch of elegance. The best part is that they can be customized to suit personal preferences, making them versatile and fun to create. Let’s dive into how these pastries can elevate any occasion.
When I first tried making these mini puff pastries, I was amazed at how simple the process was. The key is using high-quality puff pastry that puffs beautifully when baked. I love experimenting with different fillings, such as cream cheese with herbs or chocolate with strawberries, depending on the occasion. It makes the process exciting!
What truly makes these pastries stand out is the final touch - a sprinkle of powdered sugar or a drizzle of chocolate before serving. It elevates their appearance and flavor beautifully, leaving a lasting impression on everyone. Trust me, these little bites are worth every minute in the kitchen!
Why You'll Love These Mini Puff Pastries
- Versatile fillings that cater to all tastes
- Flaky, buttery texture that melts in your mouth
- Impressive appearance that elevates any occasion
Mastering Puff Pastry
To achieve that signature flaky texture, it’s crucial to handle puff pastry with care. When rolling out, ensure it’s not too thin, as this can lead to burnt edges and a lack of puffiness. A thickness of about one-eighth of an inch is ideal. Maintaining a cold environment is key; if the dough begins to get too warm while you’re working, pop it back in the fridge for a few minutes to maintain those buttery layers.
As you cut your pastry, use a sharp knife or pizza cutter to ensure clean edges. This helps the layers separate properly during baking. Additionally, always remember to dust your work surface with flour to prevent sticking, as this could disrupt the delicate layers of pastry you’ve worked hard to create. If you're new to this, don’t worry—puff pastry is forgiving, and with a little practice, you'll get the hang of it.
Filling Variations and Customization
The beauty of these mini puff pastries lies in their versatility. For a savory version, a mixture of cream cheese with herbs pairs wonderfully with the flaky exterior, adding a savory contrast to the buttery pastry. Spinach and feta provide a classic Mediterranean flavor profile that’s not only delicious but also visually appealing. When choosing your fillings, remember that liquids can cause sogginess; be sure to drain or squeeze out excess moisture to keep your pastries crisp.
For a sweet option, I recommend a blend of chocolate and strawberries for a taste reminiscent of dessert without being overwhelming. If you’re using fresh fruits, consider lightly macerating them with a bit of sugar to draw out their juices while concentrating their flavor. Always aim for balance in your filling—too much sweetness can overpower the pastry, while too little can make it feel lacking.
Ingrediënten
Gather these ingredients for your mini puff pastries:
For the Pastries
- 1 package of puff pastry (thawed)
- 1 egg (beaten for egg wash)
- 1 tablespoon flour (for dusting)
Filling Options
- Cream cheese with herbs
- Chocolate with strawberries
- Spinach and feta cheese
- Apple and cinnamon
Ensure your ingredients are fresh for the best results!
Bereidingswijze
Follow these simple steps to create your mini puff pastries:
Preheat the Oven
Preheat your oven to 400°F (200°C) and line a baking sheet with parchment paper.
Prepare the Puff Pastry
Roll out the thawed puff pastry on a lightly floured surface. Cut into squares or circles, about 3 inches in diameter.
Add the Filling
Place a small spoonful of your desired filling in the center of each pastry cut-out. Be careful not to overfill.
Seal the Pastries
Fold the pastry over the filling to create a triangle or envelope shape. Press the edges to seal and use a fork for a decorative touch.
Apply Egg Wash
Brush the tops of the pastries with the beaten egg for a golden finish.
Bake
Bake in the preheated oven for 15-18 minutes, or until puffed and golden brown. Allow to cool slightly before serving.
Enjoy your delicious mini puff pastries!
Professionele Tips
- Experiment with different fillings to find your favorite combination. For a sweet treat, consider adding a sprinkle of sugar on top before baking.
Make-Ahead Tips
You can prepare these mini puff pastries in advance, making them a great option for gatherings. Assemble the pastries up to a day ahead, then store them on a parchment-lined baking sheet in the refrigerator, covered with plastic wrap. This way, you can have them ready to bake, resulting in freshly baked pastries without the fuss on the day of your event.
If you want to freeze them, place the assembled pastries on a baking sheet and freeze until solid. Once frozen, transfer them to a resealable plastic bag. They can be baked straight from the freezer, adding an extra 5-10 minutes to the baking time. This makes them perfect for last-minute entertaining or a quick snack.
Serving Suggestions
When serving, a light dusting of powdered sugar can elevate the sweet pastries' presentation, while a sprinkle of fresh herbs can enhance the savory ones. Pair your pastries with a dipping sauce for added flavor; a simple yogurt dip or a rich chocolate sauce can complement your fillings beautifully. If you’re hosting, consider serving the pastries alongside a selection of cheeses and fruits for a delightful charcuterie board.
To make the presentation even more special, arrange the pastries on a tiered stand or decorative platter. This not only looks appealing but encourages guests to indulge in a variety of flavors. Create a themed approach by matching the pastries with your event’s color scheme, whether in the choice of fillings or by using colored dipping sauces. The more visually appealing your setup, the more exciting it will be for your guests!
Vragen Over Recepten
→ Can I use frozen puff pastry?
Yes, frozen puff pastry works great! Just make sure to thaw it properly before rolling out.
→ How do I store leftover pastries?
Store them in an airtight container in the fridge for up to 2 days. They are best enjoyed fresh but can be reheated in the oven.
→ Can I make these in advance?
Absolutely! You can prepare them a few hours ahead of time, and keep them in the fridge until baking.
→ What should I serve with mini puff pastries?
They pair well with a variety of dips or sauces like honey mustard, ranch, or a fruit compote.
Valentines Snacks Mini Puff Pastries
Gemaakt door: Harriet Bloom
Recepttype: Klassieke bakrecepten
Vaardigheidsniveau: Easy
Eindportie: 24 mini pastries
Wat je Nodig Hebt
For the Pastries
- 1 package of puff pastry (thawed)
- 1 egg (beaten for egg wash)
- 1 tablespoon flour (for dusting)
Filling Options
- Cream cheese with herbs
- Chocolate with strawberries
- Spinach and feta cheese
- Apple and cinnamon
Stappen
Preheat your oven to 400°F (200°C) and line a baking sheet with parchment paper.
Roll out the thawed puff pastry on a lightly floured surface. Cut into squares or circles, about 3 inches in diameter.
Place a small spoonful of your desired filling in the center of each pastry cut-out. Be careful not to overfill.
Fold the pastry over the filling to create a triangle or envelope shape. Press the edges to seal and use a fork for a decorative touch.
Brush the tops of the pastries with the beaten egg for a golden finish.
Bake in the preheated oven for 15-18 minutes, or until puffed and golden brown. Allow to cool slightly before serving.
Extra Tips
- Experiment with different fillings to find your favorite combination. For a sweet treat, consider adding a sprinkle of sugar on top before baking.
Voedingswaarde (Per Portie)
- Calories: 250 kcal
- Total Fat: 15g
- Saturated Fat: 8g
- Cholesterol: 50mg
- Sodium: 150mg
- Total Carbohydrates: 30g
- Dietary Fiber: 1g
- Sugars: 3g
- Protein: 5g